Sender Policy Framework (SPF) - SPF is a system whereby a special DNS record is created in your domain that identifies all of the servers that are authorised to send email for your domain. The idea being, that when a mail server receives an email that appears to have come from you, it checks for SPF records in your domain to see if the server that sent the mail message is actually authorised to do so. If it is, then your message gets delivered - if it isn't then your message is rejected as spam.
DomainKeys Identified Mail (DKIM) - DKIM is slightly different - it uses public/private key encryption techniques to attach a digital signature to your outgoing message headers using a secret private key. The receiving server will check the validity of the signature using a public key that is in your DNS . It's a bit like the digital security certificates that validate your online banking.
Domain-based Message Authentication, Reporting, and Conformance (DMARC) - DMARC adds a further DNS record that defines how your domain handles suspicious email. This enhances the capture of forged spam emails.
This guide only applies if you are using a domain using Krystal's mail servers. It is possible to add SPF, DKIM and DMARC records manually for other email providers - for example we have a guide on configuring appropriate DNS entries for use with Google / GSuite.
SPF & DKIM
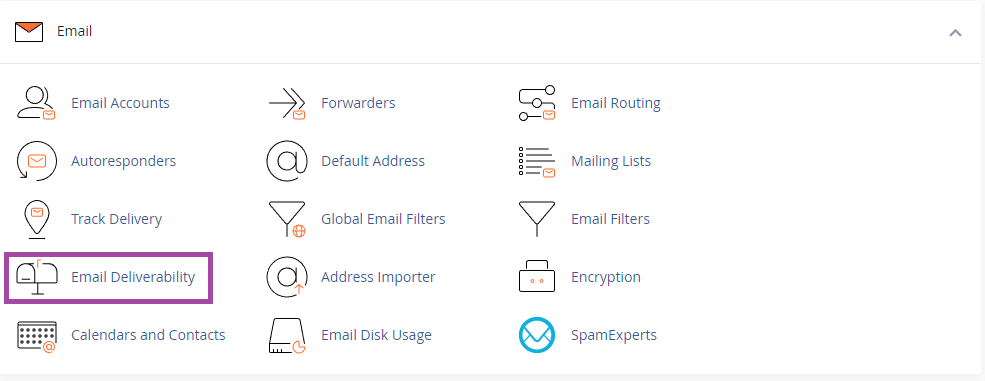
SPF & DKIM records for a domain can be accessed via Email Deliverability in the EMAIL section of cPanel.
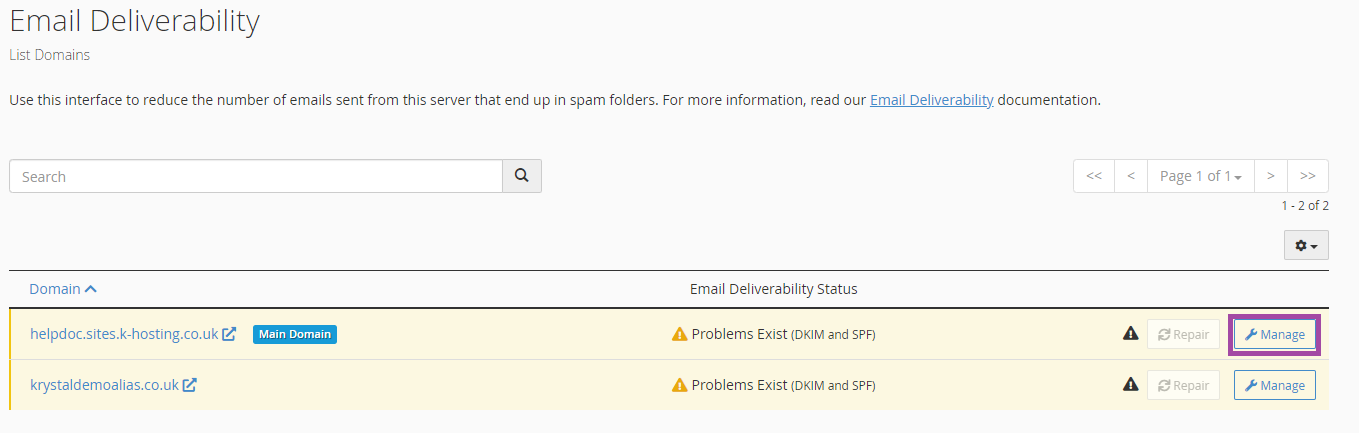
Click Manage next to the domain you'd like to setup. Repair will restore the default records if that's all you need.
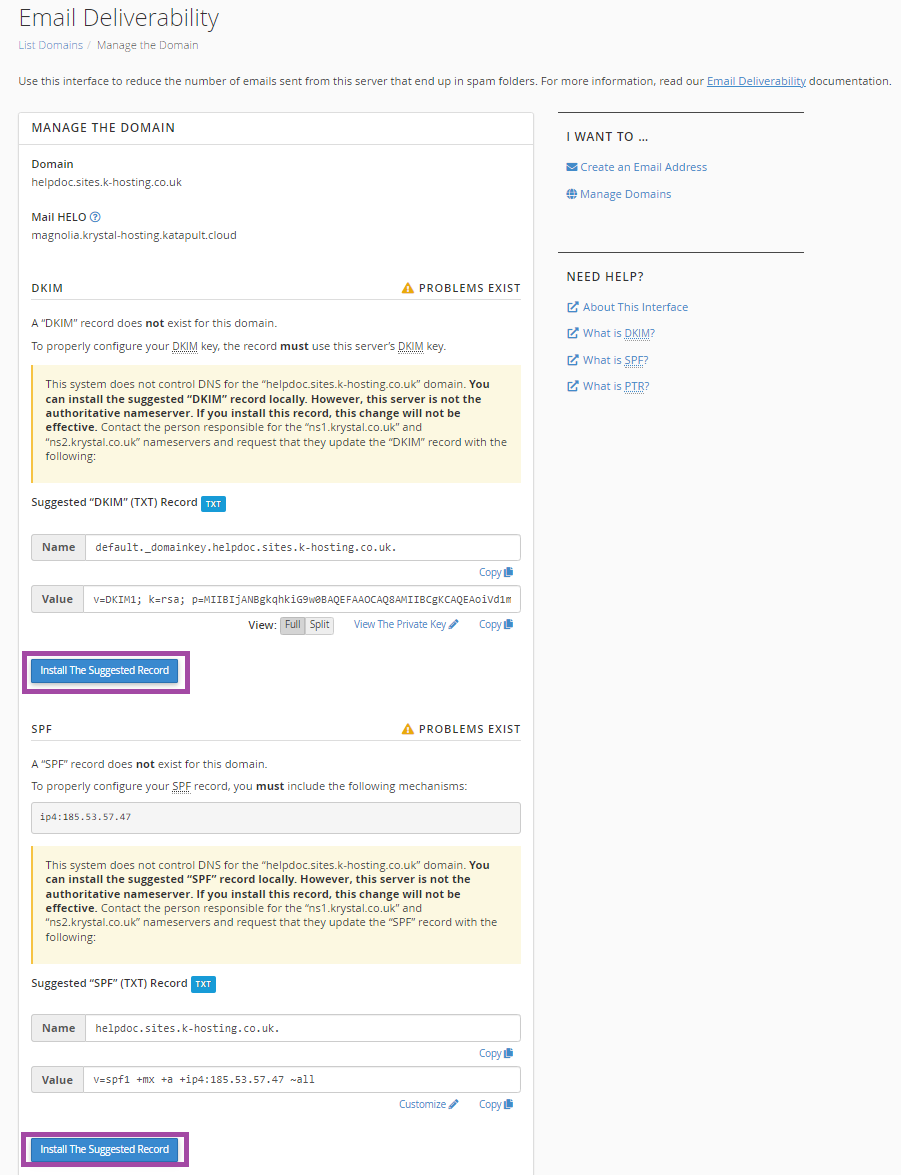
The top two sections show the suggested DKIM and SPF records. Go ahead and click Install the suggested record for each to setup the default records.
The final section shows the PTR (reverse DNS record) for the domain.
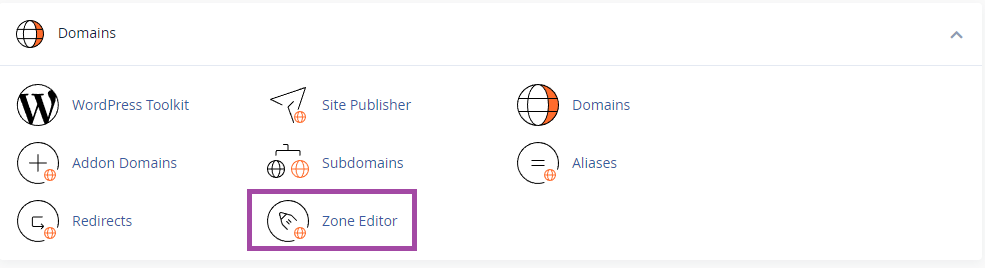
Should you need to remove or edit the DKIM & SPF records you can do so using the cPanel DNS Zone Editor.
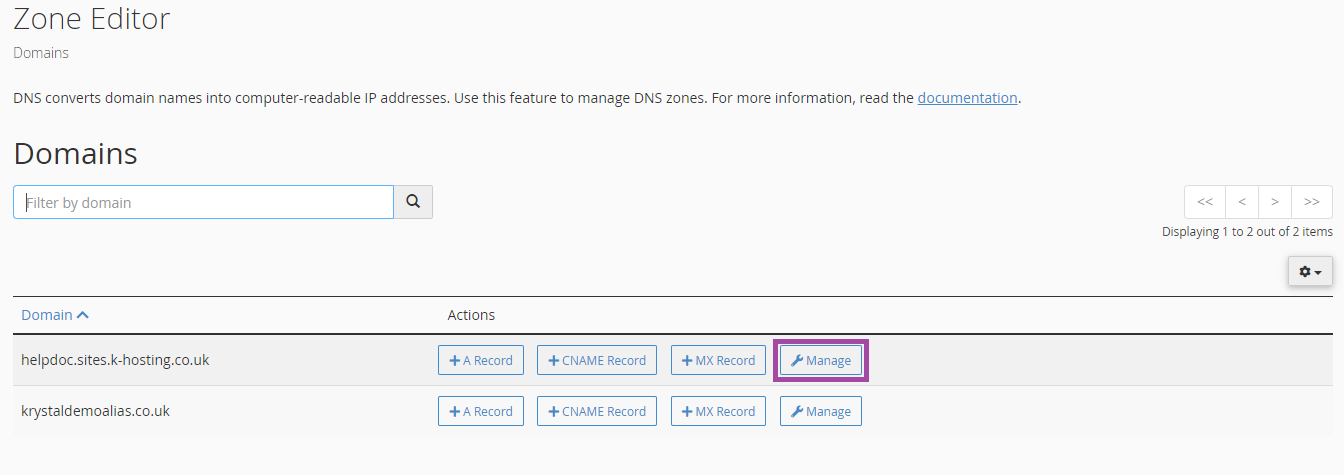
Open Zone Editor from the DOMAINS section of cPanel.
Click Manage next to the domain for which you'd like to add a DMARC record.
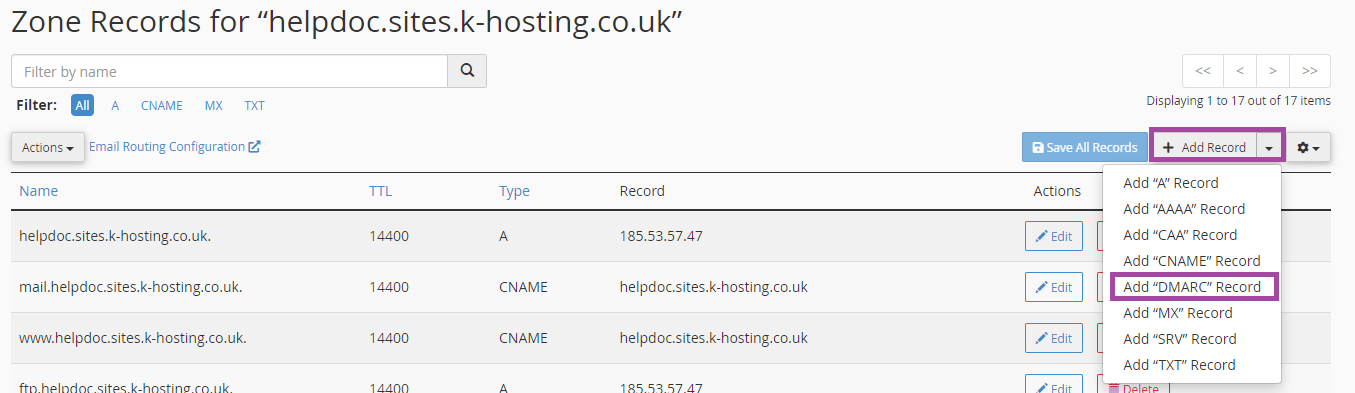
Check for any existing DMARC records listed - you can Edit the record if there is. Click the + Add Record drop-down and select Add DMARC Record.
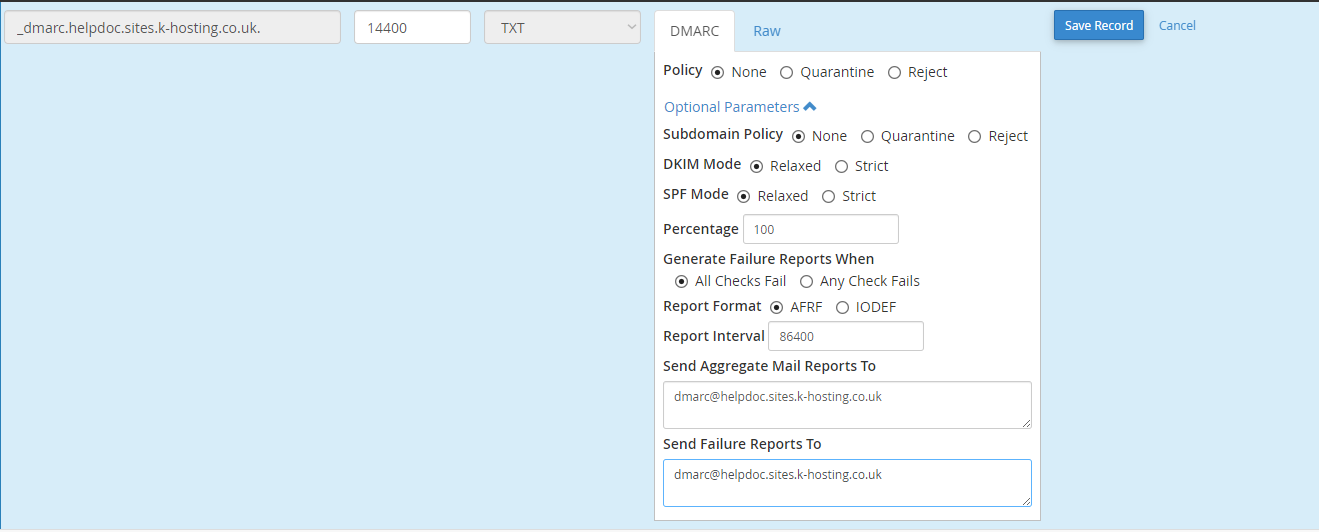
Click Optional Parameters to show all the DMARC options.cPanel defaults to adding a v1 DMARC record (v=DMARC1). Policy (p) - defines how email received from your domain is handled. Subdomain Policy (sp) - defines how your email received from your sub-domains is handled. DKIM mode (adkim) - defines whether email received from your domain that fails your DKIM policy should be delivered (Relaxed) or rejected (Strict). SPF mode (aspf) - defines whether email received from your domain that fails your SPF policy should be delivered (Relaxed) or rejected (Strict). Percentage (pct) - defines the percentage of emails received from your domain which should have your DMARC policy applied. Generate Failure Reports When (fo) - you can choose to receive a report either only when all checks fail, or when any check fails. Report Format (rf) - choose between AFRF and IODEF format for your reports. Report Interval (ri) - how often you'd like to receive reports (in seconds - 86400 = 24 hours). Send Aggregate Mail Reports To (rua) - aggregate reports contain XML machine readable details about what emails were received and their check results. Send Failure Reports To (ruf) - these are also called forensic reports - and contain the full email messages that failed DMARC authenticator. Click the Raw tab to view the actual record that'll be added to DNS when you click the Add Record button.Once you've added a DMARC record you can simply Edit the record in future to make changes.
Implementing a DMARC policy
In simple terms, you first need to ensure you have appropriate SPF and DKIM records in place for all sending sources for your domain/sub-domains.
It's important to understand that your DMARC policy is applied by remote mail servers receiving emails purporting to be from your domain.
Start by implementing a None DMARC policy - with all other options set to their default. This will mean you start to receive reports - allowing you check whether all your valid email is being received correctly. Then change your policy to Quarantine, with a low Percentage (maybe 20%) of emails. Gradually increase the percentage of emails checked as you are happy that only spam/spoofed emails are being quarantined. Finally, once you're totally happy that all genuine emails originating from your domain are being correctly authenticated by the remote mail servers you can switch to a Reject policy. Much more detail about DMARC and it's configuration options can be found at dmarc.org - external link opens in a new window.